What Can I Feed My Worms?
<<< Previous: What is Worm Bedding?
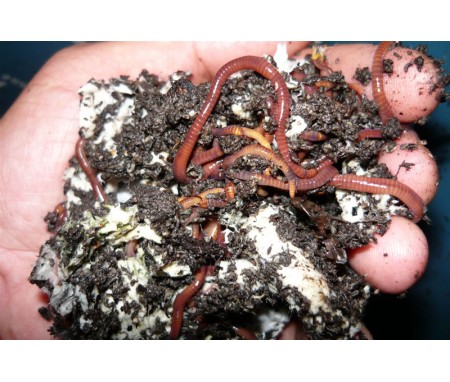
Worms eat a range of matter and can be described as omnivorous (eating plants and animals). However, they are better described as being detritivores (eating decaying plant and animal matter). Worms can also be categorized as being preferential fungivores (eating fungi). Some species have also been described as geophagous (soil eating). Worms will eat both organic matter and microorganisms. In nature, top-dwelling, or epigeic, worms will feed on dead grass and leaves as well as decomposing fruits, berries, vegetables, and animal droppings. However, worms that live farther underground, known as endogeic, will dine on algae, fungi and bacteria.
Do Not Feed List
 The types of worms that you are raising are top dwelling, or epigeic. Their ability to eat a wide variety of food makes the task of feeding them a simple one. Just about anything your family can eat, with a few exceptions, your worms can eat as well. The following list outlines the most important "don'ts" – any food that is NOT listed in the list will be acceptable to feed your worms . If you are ever unsure about any type of food item play it safe and do some research before feeding to your worms.
- Meat and Bones - Decaying meat produces offensive odors. May attract flies, rodents, ants and other pests. Bones cannot be decomposed by worms.
- Salty snack food or Fast food - Fried food such as potato chips and french fries, olives, pickles, and candy are a few examples. However, you can soak salty foods overnight, pour off the water, then feed to your worms.
- Pet feces - Dog or cat feces do not belong in your worm bin as they are not properly processed manure. May contain viral or bacterial toxins.
- Fresh green grass - A big mass of green yard clippings will decompose thermophilically and will create high temperatures that are harmful. Wait until fresh grass clippings have dried out and composted for a few weeks before feeding your worms.
- Alcohol - Very toxic. Note: When feeding worms a strictly grain diet, overfeeding will cause the grain to pile up and not be consumed. The longer the moist grain sits on top the more likely it will begin to ferment and produce alcohol as a byproduct.
- Excess citrus fruit - Citrus fruit contains a substance called limonene that can be toxic to worms in large quantities. You can throw in some orange peels -- just not 15 oranges at once!
- Old pressure-treated wood- The active ingredient is cyanide which is toxic to worms, even in very small quantities.
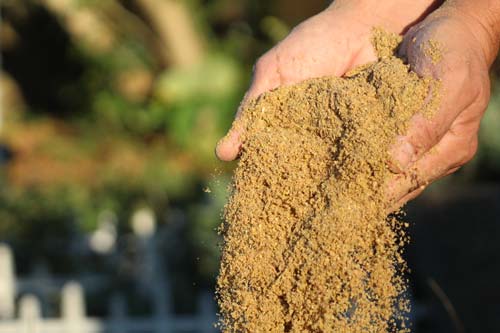
Sand/Grit
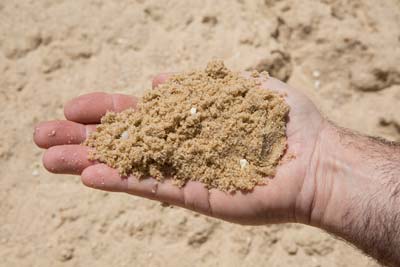 The soil found in an worm’s natural environment will contain mineral particles, organic materials, air, water and living organisms. As the worm tunnels through the soil, it is continuously ingesting matter such as the organic decomposing material, bacteria, fungus, minerals, and sand particles. The matter it consumes soon makes it to the worm’s gizzard, where the hard sand and mineral particles work in conjunction with the gizzard’s muscular contractions to grind and crush the food material into finer particles. The sand and mineral particles literally act like a set of teeth to chew the worm’s food! These ground and crushed food particles can now be more easily processed and absorbed by the worm’s digestive system.
To ensure your worms are able to digest their food to the best of their ability, I recommend that you add sand to your habitat’s bedding. Most soils already contain naturally occurring levels of some type of sand and grit. If you have the opportunity, you can dig out some soil from around your home or somewhere that you have access to collect it. If you do not want or have access to dig up soil for your habitat look for a small bag of fine grade sand at your local garden or hardware store.
The Worm’s Menu
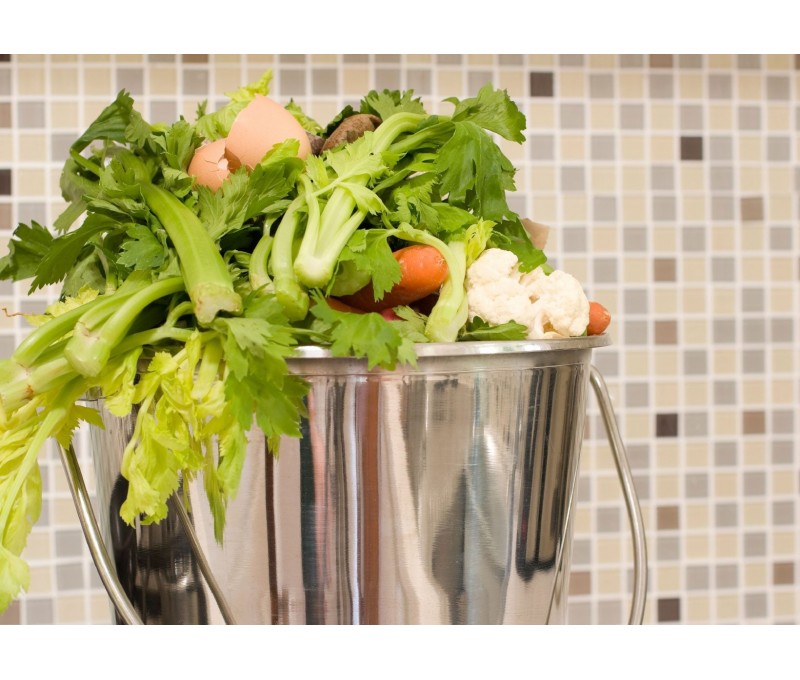
You essentially have four different types of food from which to choose to feed your worms; kitchen scraps, formulated grain feed, animal manure, and shredded paper. The goal you have chosen for raising worms will help you determine which type of food you will be serving them.Kitchen Scraps
Pros- Recycling
- Creates rich compost
- Readily available
- May attract pests
- May lack necessary quantity if kitchen does not produce scraps
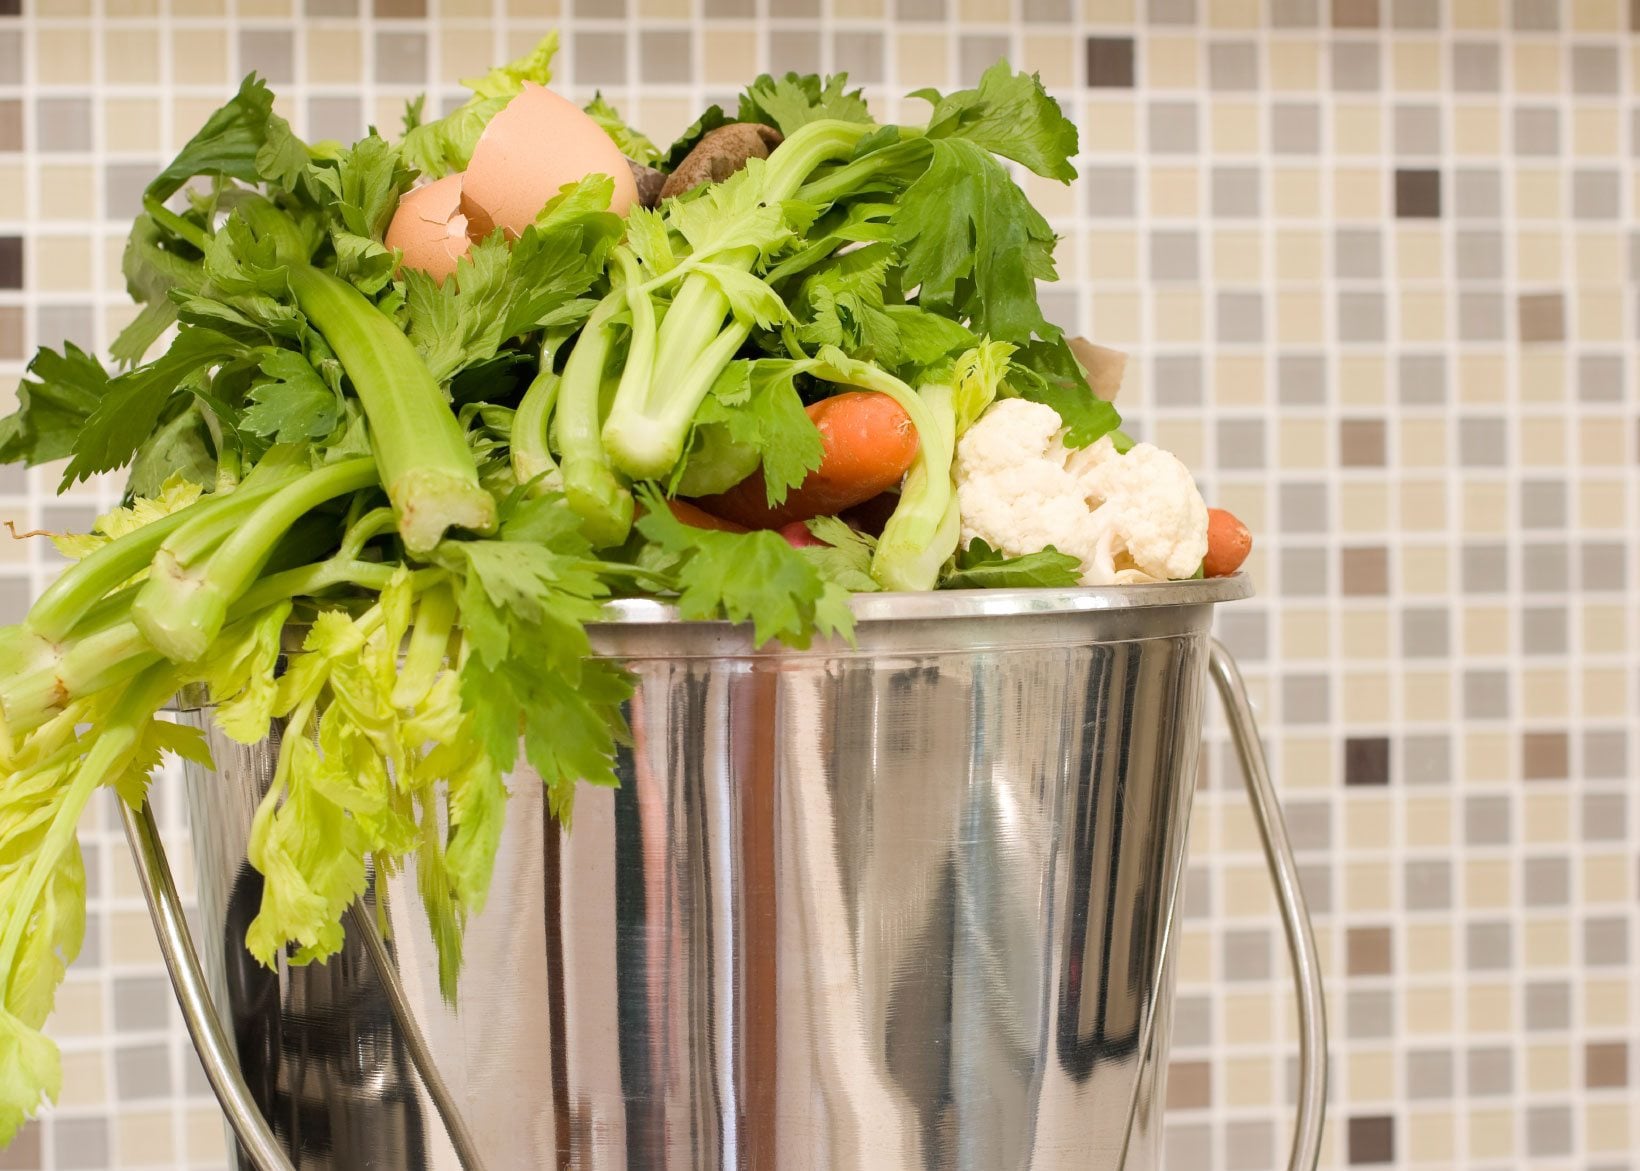 Kitchen scraps will be your food of choice when raising worms for recycling, generating castings and compost, as well as feeding your pets. Just about anything that you prepare in your kitchen can be fed to worms. The exceptions are meat, bones, fried food, sweets, and large quantities of citrus peel.
Collecting Kitchen Scraps
Your first step is to collect your kitchen scraps in a kitchen compost container. You can use an old food storage container (a 2 quart container is a good minimum size), bucket, small trash can, or you can purchase a container specifically made to collect kitchen compost material. I recommend using a container with a lid in order to control offensive odors that may happen due to decomposition. However, you do not want to use a tightly sealed container either. Without fresh air, decomposing food will begin to harbor and grow anaerobic bacteria. The reason this is a concern is that when anaerobic bacteria begin to decompose vegetation matter they can produce lactic acid or alcohol that is harmful to your worms. To ensure that fresh air can flow inside your kitchen compost container simply add a dozen small holes in the lid with ¼ inch drill bit. Store bought compost containers typically have holes already incorporated into the lid as well as carbon inserts to control foul odors.The fresher the food, the longer it will take for your worms to consume it. This is because the worms do not have teeth and do not chew food like we do. They rely on fungi and bacteria to begin the decomposition process which breaks down and begins to liquefy plant matter making it soft enough for the worm to ingest it. Do not worry if the food in your kitchen compost container has fungi/mold growth and is a bit stinky. Your worms will rather you add decomposing food to their habitat than fresh food right off of your plate.
Most of the food that you will save to feed your worms will be soft organic matter that decomposes relatively quickly such as lettuce, bread, apple cores, watermelon rinds, mushrooms, etc. However, fibrous matter, such as broccoli stalks, cabbage leaves, corn husks, and leek stalks will take much longer to decompose and could take over a month to break down and be consumed. You can help to soften fibrous plant material by chopping, then freezing, then defrosting it before feeding to your worms. This process will help fibrous materials to decompose much more rapidly due to their fibers being damaged from freezing and defrosting. Chopping the material makes it easier to bag.
Feeding With Kitchen Scraps
Your kitchen scraps are now soft and ready to feed your hungry worms. How much do you feed them, how do you add food to their habitat, and how often should you feed your worms? The amount kitchen scraps per feeding is dependent upon the size of your worm population. A quick and simple way to measure portion size is to add an amount of kitchen scraps that is roughly the size of your fist per each pound of worms. For example, if you have two pounds of worms feed them two fist-sized portions of kitchen scraps. It is that simple! In addition, although hands sizes vary, the difference is negligible in regards to feeding your worms. However, if you feel that your hands are much smaller than average go ahead and increase the amount you feed them a bit. Kitchen scraps can become gooey and smelly when allowed to decompose which makes handling them with your bare hands quite an unappealing proposition. Use an old metal or plastic serving spoon to transfer the kitchen scraps from your composting container into the worm habitat. Rubber gloves can also be worn for further protection if you so desire.The best method for adding kitchen scraps to your worm habitat is to ensure that they are completely covered. This will help to keep unwanted pests out of the habitat, especially flying insects. Gently pull away the bedding to create a small hole and place the kitchen scraps in the hole. Cover the scraps completely and give it a couple of firm taps when covered. That is all there is to it!
The first bunch of kitchen scraps you feed your worms will typically take a bit longer to be consumed than those you will add to the habitat in the coming weeks. This is because there is not yet an active fungi and bacteria culture working to help break down the material. The fungi and bacteria are functional and necessary inhabitants that work with your worms to break down and convert the kitchen scraps into rich compost, or vermicompost. As the fungi and bacteria culture grows and becomes established the rate of decomposition will increase.
It is a good idea to utilize a notebook to document feeding dates and amounts. Feel free to make notes on the different types of food matter you are feeding your worms. This data can come in handy if something goes awry in your habitat such as a population explosion of mites or your worms are not reproducing as expected.
After 3 or 4 days check the spot where you added the kitchen scraps to review the progress of consumption. If the scraps have disappeared or nearly gone it is time to feed them again. Place the next bunch of kitchen scraps in a different part of the habitat. This helps to distribute nutrients throughout the bedding and minimizes the possibility of your bedding getting too acidic due to overfeeding one spot. You will soon find that your worms will consume their food like clockwork! Again, I recommend that you take notes to document feeding dates and amounts. Using your notes, you will be able to implement a regular feeding schedule.
There may be instances were you do not have enough kitchen scraps to feed your hungry worms. If you run into this situation ask your family or friends to save their kitchen scraps. I have found that most people love the quirkiness of raising worms and will be glad to help you feed them! On the other hand, there may be a time when your compositing container is near overflowing yet your worms are not ready be fed. Instead of throwing your surplus scraps in the garbage, try freezing them if you some spare room in your freezer. Additionally, you can start an outdoor compost pile and mix your extra kitchen scraps with yard waste such as grass clippings and leaves.
Feeding your worms is pretty simple; collect your kitchen scraps in a composting container so that they begin decomposition process. Dig a hole in your worm habitat and bury the food ensuring they are well covered. Check for consumption and repeat as necessary. Record the dates, amount, and type of food you are feeding your worms. Ask your friends or family for help collecting extra kitchen scraps if you are short on food. Freeze extra surplus or compost it with your yard clippings.
Formulated Grain Feed
Pros- Complete nutrition
- Easy to fee
- Easy to track feeding amount
- May be difficult to find source
- Overfeeding may cause protein poisoning
 Formulated grain feed is becoming a popular food source for the amateur farmer who is raising worms for fishing bait castings production, and pet food. However, professional worm farmers remain the primary users of this type of worm feed.
What Is Formulated Grain Feed?
This type of feed is mainly produced by farm animal feed companies; however, many experienced worm farmers produce their own recipes using similar ingredients. These ingredients can include, but are not limited to: wheat, barley, soybean meal, poultry by-products, fish meal, alfalfa, and whey. Feed companies also fortify their grain feed with vitamins and mineral. Formulated grain feed provides a balanced diet of protein, fats, carbohydrates, vitamins and minerals.Drawbacks Using Formulated Grain
For the professional, due to the sheer size of their worm populations, utilizing grain feed is a much more efficient means of feeding than doing so with vegetation or manure. It is more efficient to measure, transport and store than alternative food sources such as vegetation matter or animal manure. A grain-only diet will fatten up worms faster than vegetation matter alone due to consistently higher protein content. Worms will also produce castings with a consistent texture when feeding with formulated grain.Another benefit is that using grain simplifies your ability to monitor and quantify results from using this type of feed. For example, by carefully tracking the amount of feed you are using as well as documenting the total weight of your worm population, you can determine how much grain feeds how many pounds of worms per month. This information is invaluable for determining feed costs in relation to population growth, as well as estimating feed costs in relation to potential population growth.
Another example for feeding your worms formulated grain is when the circumstance may arise that your household does not generate enough kitchen scraps to adequately feed them. Supplementing your worm’s kitchen scraps diet with grain feed can remedy any shortfalls.
And if your goal is to recycle paper you can also supplement your worm’s diet with grain feed. Although worms will compost shredded paper with no complaints, a paper-only diet lacks a few nutritional components that supplementing with grain feed can rectify. A quarter cup of feed every three to four days can decrease the amount of time it will take them to process shredding paper by giving them extra energy.
You can purchase formulated grain feed at your local farm supply and animal feed store. The difference between animal feed stores and the national retail pet store chains is that animal feed stores carry food for farm animals such as horses, cattle, goats, rabbits, etc. I recommend calling ahead to ensure they have it in stock. If they do not, you can request that they order a bag for you from the feed manufacturer from which they have distribution contract. Feed manufacturers typically will not ship or sell retail to individuals, only sell wholesale to their distributors. It is highly unlikely that your local pet store will carry worms grain feed.
Feeding With Formulated Grain
Grain feed is milled to a very fine texture so a little goes a long way. Measure ¼ cup of feed and evenly sprinkle on top of the bedding. Take care to sprinkle it on lightly – you don’t want to apply it so thick that you cannot see the bedding underneath. We can compare it to adding Parmesan cheese on to a pepperoni pizza; you want to still be able to see the pepperoni beneath the layer of Parmesan cheese. Lightly mist the grain with water using a clean spray bottle. Do not feed again until the grain has been consumed. Record the feeding dates and amounts in a journal to track consumption. As the population increases you should see an increase in the amount of feed consumed.Drawbacks Using Formulated Grain
There are a couple of drawbacks when using a grain-only diet. The pH level can quickly turn acidic if you over feed your worms. Too much wheat based or corn based products will sour the bedding and cause acid formation. High acid levels can also cause the formation of mites in the worm bed. A small population of mites is normal in worm beds, but a large population can indicate a high acid condition. In highly acidic conditions the food will pass to the intestine in an acidic state which causes the food to ferment in the intestine of the worm. Because the worm has no mechanism to deal with the gasses that result from fermentation, the pressure builds in the worm’s intestine until it ruptures, causing irreversible damage to the worm.You can solve the high acidity levels by adding plenty of fresh bedding – if the habitat is already full you will need to complete a bedding change. You can also reduce the acidity levels by adding calcium carbonate, which not only increases alkalinity (raises pH), but also supplies the bed with calcium, which can aid in supplying the calciferous gland with calcium. Sprinkle 2-3 tablespoons of calcium carbonate and lightly mix into the bedding.
Animal Manure
Pros- Rich in nutrients
- Worms love manure
- Sustainable resource
- May be difficult to find source
- Medication passed in manure may harm worms
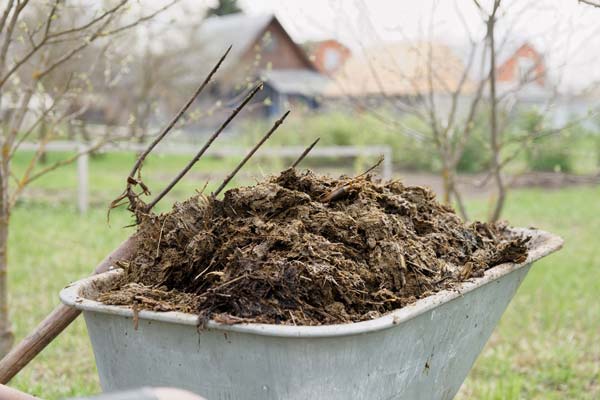 Possibly the best food source for worms is animal manure. Both amateur and professional worm farmers use animal manure as their primary food source with great success. Use animal manure if you are raising your worms to produce rich worm castings and fertilizer for gardens and houseplants, as well as fishing bait.
Manure is loaded with microbes and nutrients that worms love to consume. Studies have shown that worms quickly consume the enormous microbial populations in manure while enhancing nitrogen mineralization and the conversion of ammonium-nitrogen into nitrates. In other words, worms speed the composting process of manure and help to quickly convert it into a rich soil amendment. The resulting product is considered black gold amongst gardeners and plant enthusiasts alike.
Which Animal Manure Should I Use?
Not all animal manure is created equal, however. Some types of manure are much better suited for your worms than others. One of the clear favorites and most common type used by worm farmers is aged horse manure. Cattle and hog manure are also widely used by worms growers. Other types of manure that are less commonly used are rabbit, chicken, goat, sheep, and even llama manure.Never use dog, cat, or human feces in your worm habitats. A rule to stick by is if the animal eats meat, don’t use their manure! (No, this does not mean you can use poop from a friend that has a vegan diet).
Need-To-Knows About Animal Manure
Manure is, without a doubt, a superb substrate that your worms can both live in and feed upon. However, there are a few things you need to know before rounding up a load.You will need to ensure that the manure has properly aged several months. Fresh manure contains high concentrations of nitrogen and must complete its thermophyllic stage (hot stage) of composting before you can use it. Fresh manure is so rich in nitrogen that dumping it straight into your bins would likely have some negative effects on your worms.
Animals are often given de-worming medication in their feed which can be harmful to worms. This medication will lose its potency via the composting process as well as thoroughly leaching the manure (leaching occurs naturally with rainwater or assisted with a sprinkler or hose).
The manure also may contain a high concentration of urine that also must be leached before giving it to your worms. Some animal’s manure may contain undigested solids that should be removed from their manure. The following list are different types of animal manure that is commonly used:
- Horse manure - Many horses are given de-worming medicine several times per year. While you can still use this manure, the de-worming agent present in the medicine must be given time to break down. Allow to compost at least 4 weeks before using. Leaching will also help to dissipate medications.
- Cow and hog manure - Separate any solids from the manure before using. Allow to compost at least 3 weeks before using.
- Rabbit - Considered “cold” manure. Should be able to use right away without composting. May contain high amounts of urine if removed from underneath rabbit hutches. Leach with plenty of water if this is the case.
- Sheep or Goat - Separate any solids from the manure before using. Allow to compost at least 4 weeks before using.
- Chicken manure - Contains high levels of nitrogen and phosphorus. Leaching is a must. Allow to compost for at least 4 weeks. Recommend mixing with peat moss to reduce concentrated nitrogen and phosphorus.
Where To Obtain Animal Manure
For those who live on or near a ranch or farm, finding a supply of manure can be an easy proposition. In fact, ranchers and farmers will often be more than happy to give away the excess manure that is piling up. On the other hand, for those of you who live in a city or suburbs that is not located near a rural area, finding manure may prove challenging. The good news is you can probably find a source near you. You just need to know where to look! Use these references to locate a source of animal manure near you:- Family or friends - Your family or friends may not raise animals, but they could know someone who does. Ask around!
- Google Maps or Search Engine – Use your smartphone or computer to search google maps. Use specific search phrases such as “horse manure near me”.
- Craigslist – You can find just about anything for sale on Craigslist of Facebook Marketplace – even animal manure!
- Pre-packaged manure – You can find aged horse or cow manure at your local garden or hardware store. Look for a date when it was bagged. You don’t want manure that is over 6 months old out of a bag.
Regardless of your source, you want the manure to be aged and sufficiently leached. It would be a good idea to confirm with the person providing you with the animal manure that it has been aged and is relatively free from excess urine. A small horse ranch, for example, that immediately moves manure to piles will likely provide some good clean manure. On the other hand, a large industrial farm where manure comes into contact with a great deal of urine, other feed sources, and even chemicals, may have manure that can be hazardous to worms.
Transporting manure from the farm to where your habitat is located is best served by using a pickup-truck or flat-bed trailer. These two types of transport are preferred so that you do not have to ride in an enclosed vehicle with bags of manure. Although aged manure is not foul smelling like fresh, it will contain a cornucopia of composting insects that you will likely not want let loose inside of your vehicle. However, if you do not have another option you can use several large, heavy duty plastic garbage bags to help to secure the manure.
How To Use Manure In Your Worm Habitat
When using 100% animal manure for your worm habitat (e.g. not mixing with), it is recommended that it is located in a well ventilated area with good drainage. An outdoor location will give you the most flexibility in regards to ventilation and adequate drainage, especially if you need to conduct additional leeching. Sufficient drainage is necessary in the event the manure has high concentrations of urine. Ample ventilation is needed to prevent the buildup of gases from manure that may not have aged long enough.For the indoor worm wrangler it is recommended to mix manure with additional bedding material, such as peat, paper, or straw, and age it another one to two weeks. A good test to see if your manure is aged properly is to place it in an enclosed storage container. After a short time open the container, confirm that it smells “earthy”, and not still like manure or urine. It is also a good practice to test the manure on a small scale to see how your worms react to it. Place 4-5 inches of manure in bucket and add a small handful of worms. If they move into it immediately and seem to be actively feeding it is safe to use. Do not use manure unless you are certain that it is going to be well-received by your worms.
Chicken manure is very concentrated and potent compared to other animal manures. Be sure to thoroughly leech this type of manure and mix with shredded cardboard, peat, or coconut coir. As with other animal manure, test chicken manure on a small scale before adding to your worms.
Manure Summary
Manure is unique in that it is both bedding and food. Worms will flourish on the bacteria and fungi that thrive and feed upon this rich organic material. Unfortunately, manure cannot provide nutrients indefinitely. In time, the nutritive value of manure will decrease to the point where you will need to replenish with more. You should top off your bedding with 1-2 inches of aged manure every 2-3 weeks.Paper
Pros- Readily available
- Sustainable resource
- Not a rich source of nutrients
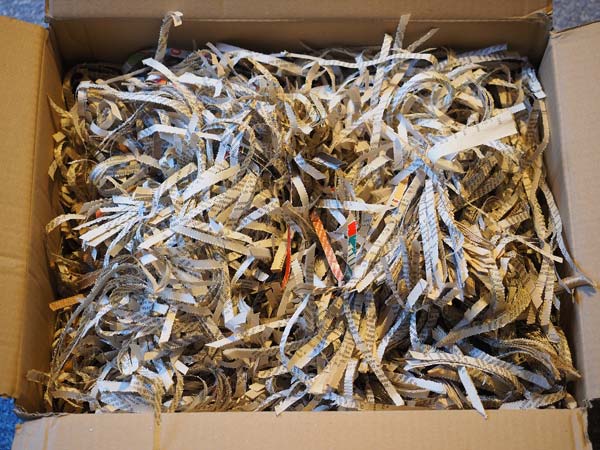 Paper products, notably shredded cardboard, newspaper, and printer paper, have long been staples of the worm composting habitat. Feed your worms shredded paper when your goal is to recycle household waste or create compost for your plants. With the sheer amount of paper thrown away every year every bit of paper you can turn into rich compost helps the environment!
I do not recommend using paper for food if your goal is to raise worms for fishing bait – your worms will not grow large due to the lack of protein content of paper products. In addition, if paper is the sole food source your worms will tend to grow slowly and may not reach their potential size. This is not to say I don’t love recycling paper in my habitats – I feed my worms paper and they love it! However, I supplement their diet with formulated grain feed to ensure a well balanced diet. When feeding primarily with paper, supplement their diet with formulated grain feed.
Picking Your Paper
There are literally hundreds of different types of paper that are produced in today’s modern world. They come in a variety of sizes, thickness, and colors. There is slick and shiny paper found in fashion magazines. Some are soft and fluffy such as facial tissue and toilet paper. Still others are thick and rigid, such as the cardboard used to package merchandise.It is important to understand which types of paper are safe to feed to your worms for two important reasons. First, the health of your worms depends on it. Many types of paper have been manufactured with compounds that could be harmful if ingested. And secondly, the castings your worms leave behind may contain harmful elements that can then be absorbed by vegetables such as carrots and potatoes.
Harmful Types Of Paper
Most types of paper are perfectly fine for vermicomposting. However, there are a few notable exceptions that you need to be able to identify.Coated paper
Coated paper is a common type of paper that should not be given to your worms. Coated paper is paper that feels slick, smooth, and has a very shiny quality. This kind of paper is used for full color magazines, illustrated books, calendars, brochures, newspaper advertisements, paper cups, photographic paper, and receipts. The compounds or polymers used for coating paper include Kaolinite, Bentonite, and styrene-butadiene. Some coated papers are coated with estrogenic and carcinogenic poisons such as bisphenol Ab (BPA). These different types of coatings make it near impossible for the worms to digest the paper. Coated paper will either be ignored or pass through their gut undigested. Ultimately, coated paper can be harmful to our wiggly warriors.Toxic chemicals
We often use paper towels to soak up spills or swab off dirty surfaces. Adding a piece of paper towel that you used to clean up spilled water or coffee is perfectly fine. However, a paper towel soaked with window cleaner, alcohol, bleach, or any cleaning chemical should never be fed to your worms. The rule of thumb is if you are not sure if it is safe, either research or properly dispose.Preferred Types Of Paper
Brown Cardboard/Paper Bags
Brown cardboard and paper bags have long been a staple in the worm habitat. And for good reason…worms love brown cardboard and paper bags! The most efficient way to feed your worms cardboard is the have it shredded or cut into 1/2 inch strips. This provides more overall surface area for the worms (and other composting organisms) to feed upon. Unless you have access to an industrial strength shredder you will most likely have to rely on manual labor with a box cutter in order to get your cardboard cut into small enough pieces. Brown paper bags are made from what is known as kraft paper. It is porous yet sturdy and absorbs moisture without clumping together. This allows plenty of air flow and passages for the worms to crawl. Brown paper bags should be able to run through a standard paper shredder one, at the very least, one sheet at a time.Newspaper
One of the best types of paper to feed your worms is newspaper. Newspaper is a preferred type of paper because it quickly softens and decomposes making it easy for the worm to consume. Unfortunately, the internet has pretty much killed the newspaper business making it more and more difficult to find a good supply, especially for those of usWhite printer paper/office paper
White printer paper is an extremely abundant type of paper used daily in today’s busy world. You can find it at work, home, as well as your local grocery store, church, fitness centers – just about everywhere you go there is white office paper to be found. Given the choice between brown cardboard and white office paper, the worm will prefer brown cardboard. White paper goes through a more complex manufacturing process which bleaches it as well as changes the texture. However, that doesn’t mean worms will not consume white printer paper. It will just take them a bit longer to do so. Shredding office paper using a shredding machine is the best way to prepare this type of paper. The resulting thin strips make it easier for the paper to decompose and be consumed.Paper towels and napkins
Paper towels and napkins also compost very quickly and easily. However, do not add to your worm habitat if you have used them to absorb any type of chemicals such as bleach or household cleaners.Cautionary Types Of Paper
Junk Mail
Junk mail is something I truly enjoy shredding and feeding to my worms. Just think of all of the nutritious fertilizer we could collectively produce (as well as keeping waste out of our landfills) if everyone vermicomposted the never-ending supply of junk mail delivered to our homes each week! Unfortunately, junk mail often includes coated paper that must be separated from the good stuff prior to shredding it. In addition, most junk mail and bills are sent in envelopes that incorporate transparent plastic windows. Be sure to either remove the windows before shredding or discard the envelope altogether. Coated paper and plastic windows should be removed from junk mail before shredding.Tips For Preparing Paper
The most efficient means in which to feed your worms with paper is by shredding it. Simply wadding up newspaper or office printer paper will leave too many large gaps and could potentially cause your worms to dry up. Shredded paper and cardboard settles into the habitat as an interwoven mass which gives it good moisture retention while allowing gaps through which the worms can navigate.Moistening paper products with water is always a must; paper is far too dry for your worms to consume. Water will soften the paper fibers making its consumption possible. Without water it would be near impossible for the worm to consume it.
Newspaper can be hand torn into 1-2 inch strips, submerged in a bucket, then hand-squeezed to remove excess water. Cardboard can also be hand- squeezed after soaking, but only if it has been cut into strips. Large pieces of cardboard cannot effectively be squeezed. White office paper, paper towels and napkins should be added to the habitat dry, then moistened with a spray bottle.
Paper Summary
Paper is the most abundant free source of material available for your worms. It can be utilized as food and/or bedding. Worms are the most attracted to brown cardboard and newspaper, but they also will consume white office/printer paper. Do not feed coated paper due to the chemicals used to create the slick, shiny coating. Never add paper towels that have been used to clean up toxic chemicals like bleach or other cleaning chemicals.Supplementing their diet with formulated grain feed or kitchen scraps should be considered if you desire fattened worms. Paper does not contain enough nutrients to sustain rapid or potential growth.
Related Post
I Want To Raise Worms...Where Do I Start?
Do you want to raise worm but are unsure of where to begin? This article will point you in the right direction.